Uploading data to our Web Reporting Center
Be sure to complete the last step "Submit Forms" to ensure forms will be properly filed.
- Create a data file to upload
- Click on the E-File with Additional Services menu
- In the Web Reporting Center frame click either the [Create W-2 File] button or the [Create 1099 File] button.
- If creating a 1099 file select the 1099 forms to be included
- Upload file information is the name and location of the file being created. You will need this information during the import process.
- Click the [Create File] button to create the file
- Log on to the Web Reporting Center
- Click here to access our Web Reporting Center
- Log in or Create Account
- Import the data file
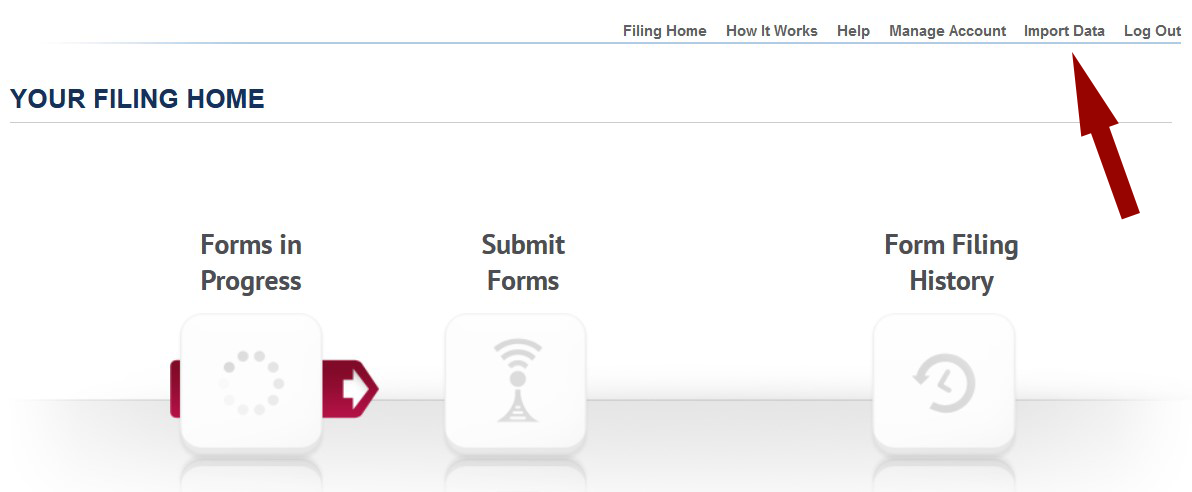
- Click Import Data from the menu at the top right
- When the [Import Data] page opens click the [Choose File] or [Browse] button to open the File Upload window and locate the file created above
- 1. Select file location - By default the files created will be in C:\TAS\22W21099\Additional Service Files
- 2. Select the file
- 3. Click [Open] button to close the window
- Click the [Import] button on the next screen to import the data file
- Payer and Recipient information will be displayed on the Forms In Progress Page
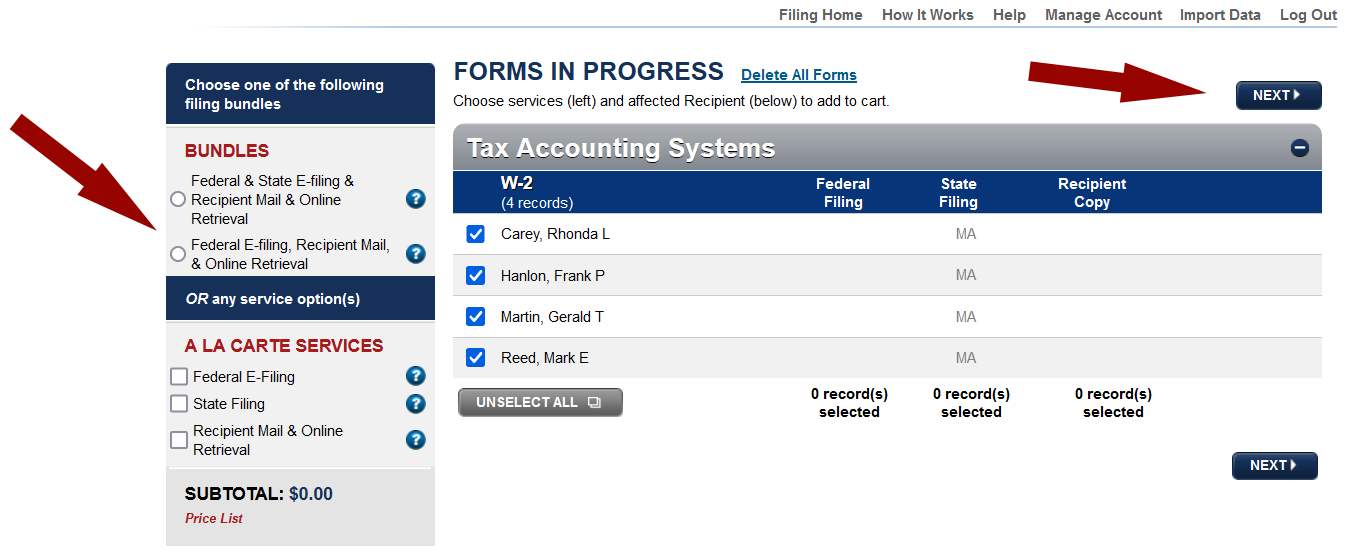
- Select Services
- From the Forms in Progress page select the options needed from the list of services on the left.
- Click the [Next] button on the right.
- Any state reconciliation forms that are required will be displayed next.
- An Add/Edit Recipient Emails screen will be displayed if any recipient did not have an email address included (Optional).
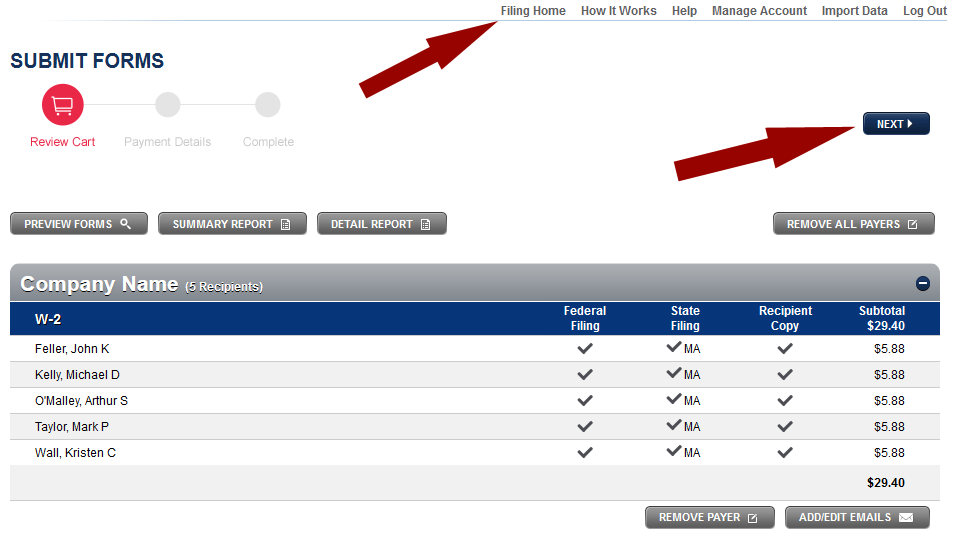
- A Submit Forms screen will show all forms ready to be submitted.
- The forms can stay on this screen allowing you to import additional companies therefore adding to the total forms.
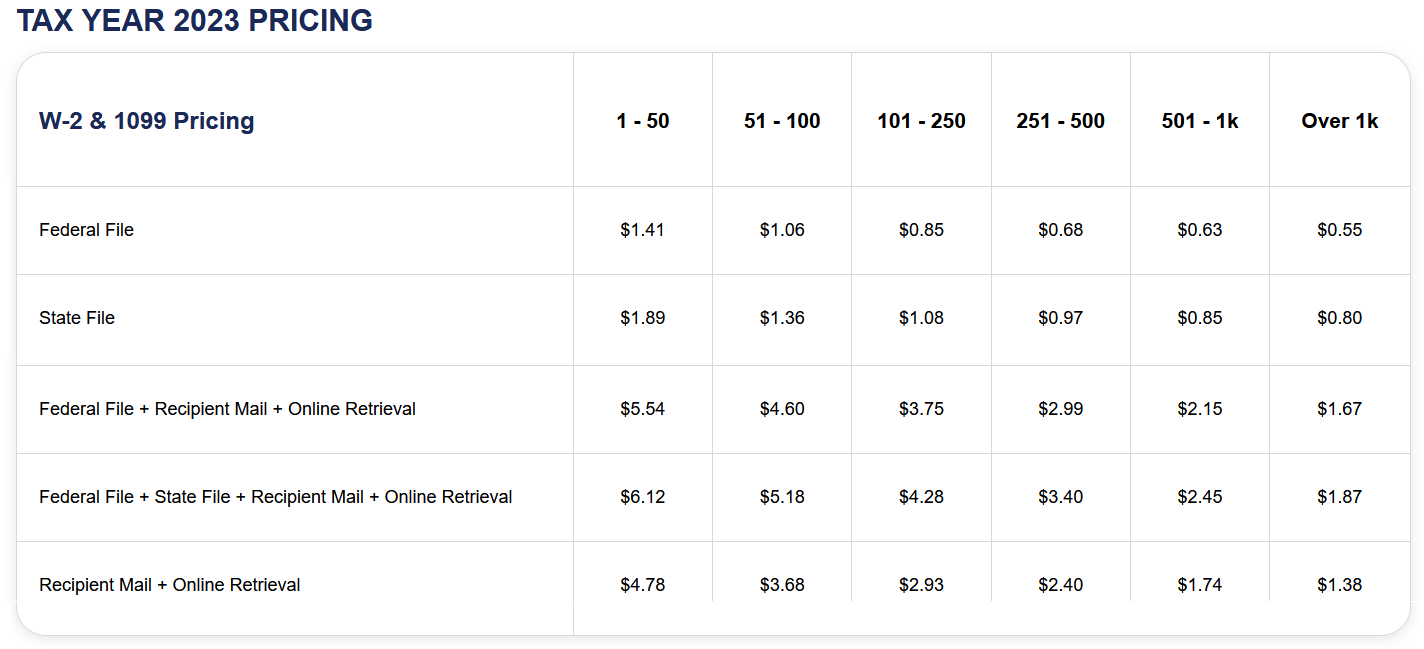
- Tiered pricing will lower your cost per form as you quantity of forms increases
- Click Filing Home to import additional forms.
- Click [Next] to continue with checkout and submit the forms
- Preview forms
- Forms can be previewed from the Submit Forms screen
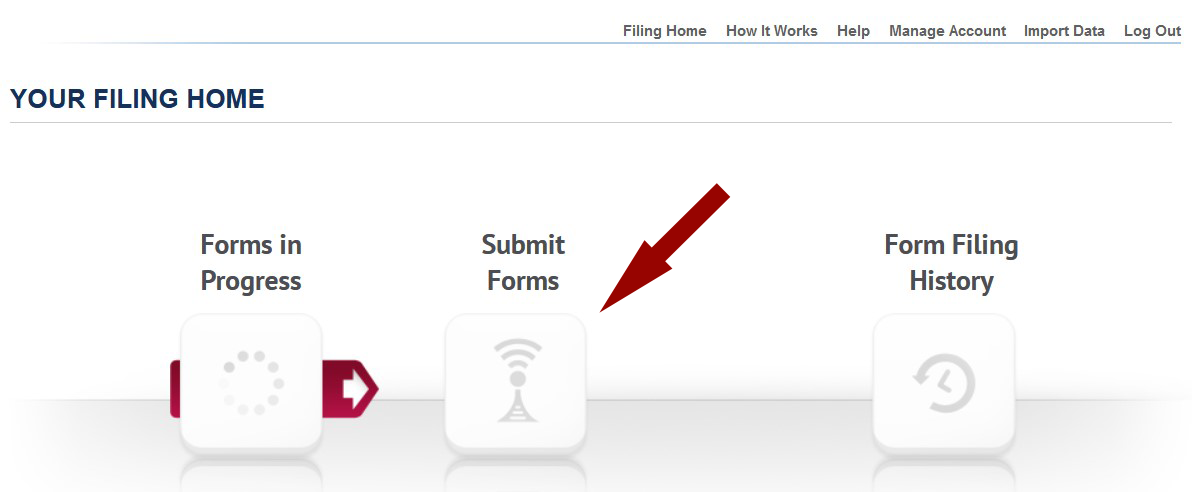
- Click on Filing Home from the menu at the top right then click on Submit Forms
- From this screen you can preview forms, view summary reports or view detail reports.
- Submit Forms
- When you are ready to submit forms for e-filing and/or Printing
- Click on Filing Home from the menu at the top right then click on Submit Forms
- Click [Next] on the upper right side of the screen
- Complete the Payment Details screen and click [Pay & Submit]
- Check the Status of Filings
- Click on Filing Home from the menu at the top right then click on Form History
- Click on Check Status
- Federal (includes W-2 & 1099)
- Federal Filing Order Confirmed - Forms have been received and are currently being processed.
- Federal Filing Sent to Agency - Forms have been sent to SSA / IRS
- Federal Filing Accepted - Forms have been accepted as good by SSA / IRS
- Federal Filing Rejected - Forms have been rejected by SSA / IRS
- After submission:
- W-2 forms can take from 2 business days to several weeks to reflect a status change. The amount of time depends on the processing time at the SSA.
- 1099 forms will take 7-10 business days to reflect a status change.
- State ("XX" below will be replaced by the state code)
- XX Filing Order Confirmed - Forms have been received and are currently being processed
- XX Filing In process - Forms are being prepared to send to the State Agency
- XX Filing Sent to Agency - Forms have been sent to the State Agency
- XX Filing Completed - Forms have been accepted as good by the State Agency
- XX Filing Rejected - Forms have been rejected by the the State Agency
- After submission:
- The last status received from the state is Filing Completed unless the filing is rejected. Be sure to check back at a later date to see if the form was rejected.
- Recipient Copy
- Recipient Mailing Order Confirmed - Forms have been received and are being prepared for mailing
- Recipient Mailing Sent - Forms have been mailed to the recipients via USPS.
- Online Retrieval Confirmed - Forms are being prepared for online retrieval
- Online Retrieval Posted - The recipient forms have been posted to the online retrieval portal.


